Sunday, May 1, 2011

Competition: Chico Brewing Club Results

I just got my results for my Chico entries! Unfortunately, no ribbons this time. This is my first competition that I've come home empty handed. I was sure that my American Wheat Ale (Holler at Me) would place, too.

As you can see, Holler at Me got a decent score, at 36.25. The critiques were primarily around too much hop flavor. Given that I tweaked the recipe, I probably just over did it on the hops. The other complaint was that the hef was too clear. I noticed this as well the first couple of times that I poured. It's not actually clear, but the wheat seems to settle at the bottom of the bottle, so you need to flip the bottle once to stir it up. I'm not sure why this is.


As you can see, I was just shy of getting into the "Excellent" category. Dang.


For kicks, I also entered my Irish Red Ale that I did for St. Patrick's Day. I wasn't expecting a whole lot. The score of 29.5 is about dead on with what I expected. Major critique on this one was that it was too bitter.


Keg Day: Sweet Stout (Chocolate Stout Redux)

Today, I'll be showing how to clean and fill an empty corny keg. If you'll recall, I brewed a sweet chocolate stout a week ago, and it's time to keg it up. The keg did have an American IPA in it, but I bottled the remnants just before this post.

Let's get started.

If you'll recall I recently purchased a freezer chest, which is currently housing my cornelius keg (corny keg), my CO2 tank, and some Irish Red Ale in a growler.


As you can see, the keg is a 6 gallon keg with two tubes coming out of it. The black-cap tube is for beer coming out of the keg, and the grey-cap tube is for gas (CO2) coming into the tube. I keep my chest at about 45 degrees, and my CO2 pressure at about 12PSI. 

At this point, the keg is essentially empty, minus a little bit of beer sitting on the bottom.

Make sure that the CO2 tank has been turned off at the regulator first.

The next step is to remove the beer line. You do this by pulling up on the edges of the cap. Here, the beer line has been removed.


Next, remove the CO2 line in the same manner. You can see here that the grey cap is dangling out of the freezer chest now.


At this point, the keg is no longer connected to anything.

Between each keg filling, I always sanitize everything to keep the beer from getting contaminated with off flavors.

Here, I've got a 5 gallon bucket of water and starsan, and I've filled the beer tube with sanitized water. The trick to this is to let water drain freely from the bucket, and then jam the cap into the bucket's nozzle until water flows into it. Make sure top open the tap at the other end of the tube, so that water can displace the gas in the tube.


Now, it's time to sanitize the keg. Keep in mind that the keg is still pressurized at this point, so you have to let the CO2 out. Pull the gas-out pin on the top of the keg to do this.


Now, you can lift up on the keg cap's lever. This will allow the keg cap to disconnect from the keg.


As you can see, the keg is empty, but a big of CO2 gas is still floating around inside.


Now, I remove the keg posts.

These posts look very similar, but one is has little etchings in the nuts that make it look like a star, and the other doesn't. The "star" keg post is the gas-in post, and the "non-star" keg post is the beer-out post. They look interchangeable, but they aren't. I struggled for several days when I first got my keg only to figure out that I had my keg posts reversed.


This is the beer out post. As you can see, it has no etching on the bottom of the post. The little spring to the right is what goes inside the post (to prevent gas/beer from escaping).

The other two pieces to remove are the tubes that go into the keg.

The tube on the right is the beer-out tube. This tube slides into the beer-out hole (under the beer out post), and goes all the way down the keg to pull beer from the bottom of the keg into your beer-out tap.

The smaller tube on the left is the gas-in tube.


Here, I've filled the keg with PBW (powdered brewer wash). This will get any beer gunk out of the keg.


While the keg is sitting with PBW, I measure the specific gravity of my chocolate stout. It has an FG of 1.022. This is pretty high, especially since the OG was low (1.046). The final ABV is ((1.046 - 1.022) * 131) 3.14%. This is very light.


After I measure the ABV, I drain the PBW, and sanitize the keg with Star-San. When that's done, it's time to move the beer from the carboy to the keg. You can see here that I drain the carboy in the same way that I would if I were putting the beer into a bottling bucket. The only difference is that I'm draining it into a keg.

The white UFO attached to the orange top allows me to blow (filtered) air into the carboy, which forces beer down the tube, and into the keg.

 Things are progressing nicely.
 Almost done.
 Now, it's time to add the chocolate extract! I bought this chocolate extract from a local baking shop. It's VERY potent. Adding this small vile to 5 gallons of sweet stout will give it a nice chocolate-aroma, and a very slight chocolate flavor.

Once I've added the chocolate extract, it's time to cap up the keg. You can see here that I've also re-inserted both keg tubes, and re-attached both keg posts to their proper gas-in/beer-out posts.
Next, it's time to purge the keg of any oxygen. Oxygen can mess with the flavor of beer, so we have to evacuate the keg. To do this, first re-attach your CO2 line to the keg, and turn the CO2 on at the regulator.

After the CO2 is attached and on, you should hear it fill the keg. Once it's filled (the noise has stopped), turn your CO2 off at the CO2 regulator, and pull the gas-out pin on the top of the keg. This will allow the CO2 and oxygen mixture to escape from the keg until it returns to normal pressure.

Turn the CO2 on at the regulator again, and repeat the exercise two more times (three, in total).

 Finally, attach your beer-out tube.

That's it! You now have beer on tap! Typically, I let my keg rest for several days (2-3) before drinking beer from it, as it takes time for the CO2 to properly carbonate the beer. If you drank from it immediately, the beer would be quite flat.

Sunday, April 24, 2011

Bottling Day: American IPA

Before I started this blog, I had an American IPA in my keg. It was actually the first beer that I drank once I got my freezer chest, and it was really good. Unfortunately, I'm running low on it, and it's time to fill the keg with my Chocolate Stout. Before I can keg up the stout, I need to clear out the last bit of the IPA. There's enough left in the keg that I want to bottle it, rather than toss it.

I'm feeling a bit lazy, so rather than using the heavy-duty keg bottle-filler, I thought I'd try a trick that someone recommended at my local homebrew club. Basically, you can quickly fill a bottle with beer by jamming a spring loaded bottle filler directly into a cobra tap.

My picture is wonky because it's sideways, but you can see the spring loaded filler that I've jammed into the tap.


It worked, but not particularly well. The bottles all foamed up as I filled them with the tap. By the time that I was able to cap them off, they had lost a significant amount of CO2 and beer. Most of the bottles are only about half full.


I'm not sure whether my keg pressure/tubing ratio is to blame, or whether this method just doesn't work well for 22 oz bottles, but it sure didn't work well for me. I probably won't be doing it again.

One side note is that, even from the cobra tap into the glass, I get major foaming. I'm pretty sure that the tubing width/length is not set to the proper ratio for the pressure/temperature of my keg.

Brewing Day: Sweet Stout (Chocolate Stout Redux)

After doing so many wheat beers lately, I thought I'd go for the opposite end of the spectrum this time. My sweet stout took second place in the Napa brew competition this year, so I figured that I'd try and perfect the recipe a bit. 

In the last few brews, I've nearly boiled over several times. Rather than cleaning up hot wort off the stove, I decided to spring for a propane burner. 

I went to Home Depot and picked one up. It was about sixty dollars, and 45,000 BTUs. The burner came with a turkey pot, since it was meant for deep frying turkeys.

I got home and assembled the thing in about a half hour. Here's the kettle steeping.


So far, so good.


Now, I'm running into problems. After two to three minutes, the flame is going out. I'm not sure if the regulator is broken, I just need too much heat for the little 45,000 BTU burner, or what. In any case, I re-light it several times, and it still doesn't last. The water is only up to about 100F, and not going much higher.

At this point, I've steeped the grain, but not added the malt extract yet.


Eventually, I give up, and bring the kettle inside. The water boils as expected.


A quick shot of the recipe.


Things are progressing nicely. The malt extract has been added here. Notice the side-mount thermometer. This was by far the best part of the burner that I bought. I definitely need to pick one up for the future. It clips nicely to the side of the pot.


The hops have now been added. It's time to wait things out.


Here we are, call loaded up in the Carboy.


All in all, this was a pretty bad experience with the burner. I'm going to return it to Home Depot.

Everything turned out pretty well with the sweet stout. The OG is 1.046. Not quite as high as I wanted, but not terrible either. Next run, I'd probably add a bit more LME, and a bit more DME.

Friday, April 22, 2011

Competition: Chico Brewing Club

I'll be entering my American Wheat Ale (Holler at Me) and Irish Red Ale (Old Red) in the upcoming Chico Homebrew Competition. The competition will be hosted at the Sierra Nevada Brewery. I'm expecting good things from Holler at Me.

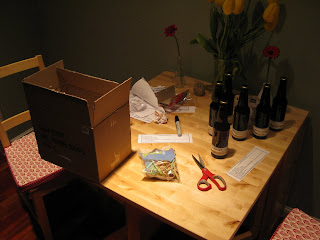
Here I am packing up.

Saturday, April 16, 2011

First Pour: German Hefeweizen (Blueberry Banana)

After a long day, I decided to bust open my German Hefeweizen yesterday, and try it out. If you recall, I brewed this beer with Blueberry Muffin Top Cereal for my brewing club's upcoming "Broken Hydrometer" competition. The goal is to come up with a brew that uses an entire box of cereal.

Here's the first pour! It has a nice thick head, and great haziness, but that's about all I have in common with the BJCP guidelines.


Over all, the beer is pretty bad. The banana flavor is overwhelming, and there's a slight off-flavor that makes the beer taste metallic. It's drinkable (I had two bottles), and has a pretty strong kick at 5.5% ABV, but it's not something that I'd drink voluntarily.

The cereal flavor is completely missing, too! There is a slight after-taste of the sweetener from the cereal, but there's no blueberry flavor at all. This is pretty disappointing! After the competition, I'll probably end up dumping the rest of it, unless someone wants to take it off my hands.


First Pour: American Wheat (Holler at Me)

This post is a bit delayed, but here's a quick shot of the first pour of my American Wheat (Holler at Me).


Over all, great flavor, and coloring. Mostly malty/wheaty flavoring. The aroma is wheaty, with very little hop smell/bitterness. One oddity is that my first pour came out almost entirely clear (as opposed to hazy). The second pour from the bottle came out totally hazy (as it should). I've just been telling people to spin the bottle a bit before pouring to get the proper haziness. ABV is dead on at 5%. Definitely more hops and less yeast than my German Hefeweizens.

For reference, here's a link to the BJCP style guidelines for American Wheat. Over all, I think this beer is dead on for the style. I'm going to enter this one in the 2010 Chico Homebrew Competition.