Sunday, April 24, 2011

Bottling Day: American IPA

Before I started this blog, I had an American IPA in my keg. It was actually the first beer that I drank once I got my freezer chest, and it was really good. Unfortunately, I'm running low on it, and it's time to fill the keg with my Chocolate Stout. Before I can keg up the stout, I need to clear out the last bit of the IPA. There's enough left in the keg that I want to bottle it, rather than toss it.

I'm feeling a bit lazy, so rather than using the heavy-duty keg bottle-filler, I thought I'd try a trick that someone recommended at my local homebrew club. Basically, you can quickly fill a bottle with beer by jamming a spring loaded bottle filler directly into a cobra tap.

My picture is wonky because it's sideways, but you can see the spring loaded filler that I've jammed into the tap.


It worked, but not particularly well. The bottles all foamed up as I filled them with the tap. By the time that I was able to cap them off, they had lost a significant amount of CO2 and beer. Most of the bottles are only about half full.


I'm not sure whether my keg pressure/tubing ratio is to blame, or whether this method just doesn't work well for 22 oz bottles, but it sure didn't work well for me. I probably won't be doing it again.

One side note is that, even from the cobra tap into the glass, I get major foaming. I'm pretty sure that the tubing width/length is not set to the proper ratio for the pressure/temperature of my keg.

Brewing Day: Sweet Stout (Chocolate Stout Redux)

After doing so many wheat beers lately, I thought I'd go for the opposite end of the spectrum this time. My sweet stout took second place in the Napa brew competition this year, so I figured that I'd try and perfect the recipe a bit. 

In the last few brews, I've nearly boiled over several times. Rather than cleaning up hot wort off the stove, I decided to spring for a propane burner. 

I went to Home Depot and picked one up. It was about sixty dollars, and 45,000 BTUs. The burner came with a turkey pot, since it was meant for deep frying turkeys.

I got home and assembled the thing in about a half hour. Here's the kettle steeping.


So far, so good.


Now, I'm running into problems. After two to three minutes, the flame is going out. I'm not sure if the regulator is broken, I just need too much heat for the little 45,000 BTU burner, or what. In any case, I re-light it several times, and it still doesn't last. The water is only up to about 100F, and not going much higher.

At this point, I've steeped the grain, but not added the malt extract yet.


Eventually, I give up, and bring the kettle inside. The water boils as expected.


A quick shot of the recipe.


Things are progressing nicely. The malt extract has been added here. Notice the side-mount thermometer. This was by far the best part of the burner that I bought. I definitely need to pick one up for the future. It clips nicely to the side of the pot.


The hops have now been added. It's time to wait things out.


Here we are, call loaded up in the Carboy.


All in all, this was a pretty bad experience with the burner. I'm going to return it to Home Depot.

Everything turned out pretty well with the sweet stout. The OG is 1.046. Not quite as high as I wanted, but not terrible either. Next run, I'd probably add a bit more LME, and a bit more DME.

Friday, April 22, 2011

Competition: Chico Brewing Club

I'll be entering my American Wheat Ale (Holler at Me) and Irish Red Ale (Old Red) in the upcoming Chico Homebrew Competition. The competition will be hosted at the Sierra Nevada Brewery. I'm expecting good things from Holler at Me.

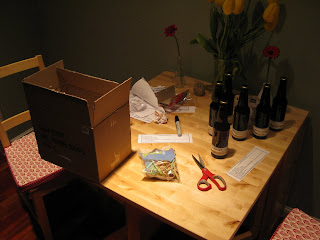
Here I am packing up.

Saturday, April 16, 2011

First Pour: German Hefeweizen (Blueberry Banana)

After a long day, I decided to bust open my German Hefeweizen yesterday, and try it out. If you recall, I brewed this beer with Blueberry Muffin Top Cereal for my brewing club's upcoming "Broken Hydrometer" competition. The goal is to come up with a brew that uses an entire box of cereal.

Here's the first pour! It has a nice thick head, and great haziness, but that's about all I have in common with the BJCP guidelines.


Over all, the beer is pretty bad. The banana flavor is overwhelming, and there's a slight off-flavor that makes the beer taste metallic. It's drinkable (I had two bottles), and has a pretty strong kick at 5.5% ABV, but it's not something that I'd drink voluntarily.

The cereal flavor is completely missing, too! There is a slight after-taste of the sweetener from the cereal, but there's no blueberry flavor at all. This is pretty disappointing! After the competition, I'll probably end up dumping the rest of it, unless someone wants to take it off my hands.


First Pour: American Wheat (Holler at Me)

This post is a bit delayed, but here's a quick shot of the first pour of my American Wheat (Holler at Me).


Over all, great flavor, and coloring. Mostly malty/wheaty flavoring. The aroma is wheaty, with very little hop smell/bitterness. One oddity is that my first pour came out almost entirely clear (as opposed to hazy). The second pour from the bottle came out totally hazy (as it should). I've just been telling people to spin the bottle a bit before pouring to get the proper haziness. ABV is dead on at 5%. Definitely more hops and less yeast than my German Hefeweizens.

For reference, here's a link to the BJCP style guidelines for American Wheat. Over all, I think this beer is dead on for the style. I'm going to enter this one in the 2010 Chico Homebrew Competition.

Sunday, April 10, 2011

Bottling Day: German Hefeweizen (Blueberry Banana)

After brewing, and dry hopping Blueberry Banana German Hefeweizen, it's finally time to bottle! If you recall, I have an upcoming club meeting where everyone is brewing a beer with cereal in it, and I ended up with Blueberry Muffin Top cereal. I got the idea for a German Hefeweizen because the German Hef naturally comes with a slight banana flavor to it. Now, let's get down to bottling.

First, I move the carboy into the garage. I let it sit for a while to settle out the yeast that got kicked up during the move.


While the carboy is settling, I start the cleaning. Five gallons of water, Starsan, and all the equipment that I'll need.


A quick snap of the recipe while things are cleaning.


It's time to get the corn sugar ready. I set the boiler on low to slowly melt the sugar into the water, which will create a nice simple syrup. When added to the beer, and bottled, the left-over yeast will consume the sugar, and create CO2 in the bottle. This is called bottle priming (as opposed to using a CO2 canister).


Before I move the beer from the carboy to the bottling bucket, I take a quick dip to see where our final gravity settled at. It appears to have stopped at 1.020. This is a bit high.

When I added the six ounces of the cereal to the carboy during the dry hop last week, it appeared to totally kill the yeast. I got nervous, and took a sample last week, and it came out to 1.020 as well, so over the course of a week, the yeast has not done anything. Bummer.

1.020 is still drinkable (especially with a sweet beer, and a starting gravity of 1.062), but it could have been lower. Next time, I would wait to dry hop until fermentation has completed.


Time to bring the bottling bucket into the garage and fill it with beer.


Yikes. While attaching the siphon, I discover that I actually can't get the dry hopped cereal out of the bucket because the opening is too small. I decide to punt on that problem until later, and just leave it draped over the side for now.


I've started the siphon. While watching the beer go down, I notice some very strange purple/blue bubbles on the side of the bucket. It looks almost like vinegar suspended inside olive oil. The only thing that I can think of is that the cereal has some really funky food coloring?


Here we are, filling the bucket up. The corn sugar has already been slowly stirred in at this point.


Time to get the bottles ready. I'm actually out of bottles at this point, so I went and picked up twenty four more at More Beer.


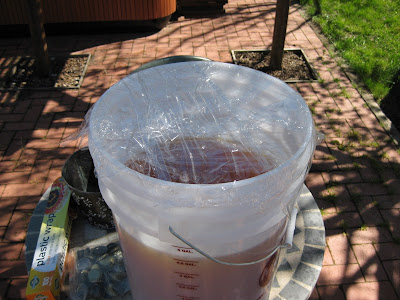
I've put the bottling bucket on the table out side because it's such a nice day. I cover the top in Saran wrap to keep bacteria, dust, and twigs from getting into the beer.


Time to sanitize some bottles.


The first beer has been bottled!


Half way done.


Another snap of the progress. Benny's butt, too.


Benny's having a Lazy Sunday.


And we're done!


Everything in its right place.


Now, how do I get the dry hop bag out? Pulling just starts to rip the bag. I decide to open the bag, and fill the carboy with water. The turbulence from filling the carboy causes the cereal to float out of the bag.


Victory. Now, I just need to empty the cereal-filled carboy.


Cleaning again. I drain the kettle back into the bucket to clean up the equipment.


I fill the dirty carboy with water, and add ten scoops of PBW (powdered brewery wash).


Cleanup done.


That's all for now. Stay tuned. Next week, I'll be brewing my chocolate stout!

Thursday, April 7, 2011

Gadgets: Freezer Chest Moisture Prevention

After announcing that I'd gotten a new kegerator setup, some friendly people tipped me that I should probably get some moisture absorbent in it, to prevent mildew and mold. The product that was recommended to me was Damprid. After searching Target, Safeway, and Albertson's, I finally found it at Orchard Supply Hardware.

It's now all set up in my freezer chest. Let the moisture prevention begin!


Monday, April 4, 2011

Gadgets: Freezer Chest Arrival

As I mentioned in one of my previous posts, I am going to be chilling my keg in a freezer chest. Spring has come on strong, and the temperature has risen to the point where my beer is getting warm in the garage. While this is fine for storage, for drinking from the tap, it's not ideal.

On Friday, I ordered a freezer chest from Sears. Initially, I checked Home Depot and Orchard Supply. I also called a lot of other specialty appliance stores in the area.

Eventually, I settled on this Kenmore freezer chest. I chose it partially because Sears has in-store pickup, and partially because it's reasonably priced (for a 6.7 cu. ft. model).

Without further ado, here are some pictures of the installation.


There is a slight ledge on the right, which makes it a perfect place to store extra bottled beer, and a CO2 canister. I'll probably remove the mesh on the top.


Here it is all closed up. It's surprisingly compact.


Here's a comparison shot with my corny keg next to it. The model says it's thirty three inches in height. My keg only reaches about twenty six inches.


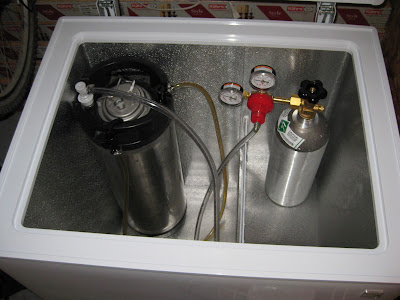
Here, I've transferred the keg and CO2 inside the chest. Everything looks good.


A top down shot. This really doesn't do it justice, since my cheap digital camera is distorting the depth. You can definitely fit two corny kegs inside, and possibly even three (though it might be slightly too narrow for three).


Oops. After trying to close the lid, I realize that the gauge on the CO2 tank makes it slightly too tall when sitting on the ledge on the right. I can rotate the gauge slightly to make it fit, but I decide to set it into the lower basin, for now.


That's it! Unfortunately, because I transferred the chest on its side (in my car), I have to wait for two hours (according to the instruction manual) before plugging it in, so that the Freon can settle back down. I'm letting it sit open, as well, since there's a plastic smell inside.

I'm still deciding whether to put a tap on this chest, but the cobra tap will do for now.

Sunday, April 3, 2011

Bottling Day: American Wheat Ale (Holler at Me)

Well, it's finally time! After brewing, fermentation, and labels, I'm ready to bottle Johnny's American Wheat Ale. Let's get started.

First, I move the carboy into the garage. I let it sit for a about a half day so that the yeast settles back to the bottom.


You can see, I've still left the blow off tube in. There's no point in letting any bacteria in, if we can avoid it.


Now it's time for cleaning. I get everything that I need, and put it in the bottling bucket.


Now, I move it outside, and fill it with water.


Next, it's time for some sanitizer. One ounce of Starsan for five gallons of water. One minute of contact time.


While things are sanitizing, I take a quick look at the recipe, and grab my corn sugar.


I put the corn sugar in 2 cups of water, and let the water warm slightly (not boiling yet, though). I will boil the corn sugar, and put it into the beer. This extra sugar will get consumed by the yeast while it's in the bottle, which will release CO2 (carbonating the beer).


Now it's time to get the siphon ready. I take the blow off tube out, and cover the top with Saran wrap.


Here, I fill my beaker with some beer, and put a little bob into it. The bob will measure specific gravity.

In this case, Johnny's Hef is coming up with a final gravity of 1.014. This is great news. His original gravity (before fermentation) was 1.052. The ABV can be calculated with the simple expression (1.052 - 1.014) * 1.31 = 4.978%. Dead on for the 5% that I was shooting for.


Here, I have run some water through the siphon, and looped the tubing back on itself. This will ensure that the inside of the tube gets sterilized.


Now, I drain the bottling bucket into the eight gallon kettle that I have. I'll use the kettle to sterilize bottles.


After a quick thought, I decide to use a tube instead. This has the added benefit of sterilizing the inside of the tube.


While the bucket is draining, I attach the siphon to the carboy. I'll blow into the little white UFO to force beer to go out the top, and into the bottling bucket.


The beer is now draining into the bottling bucket.


I run inside and grab the boiled corn sugar water, and pour it gently into the beer. Too much oxygen from splashing the beer at this point can ruin it.


While the carboy continues to drain, I sterilize some bottles.


Almost done.


Doing some quick math, I realize that I'm running short on bottles. I have only five twelve ounce bottles, and only a couple of twenty two ounce bottles. After some searching, I remember that I have some extras in the back bedroom!


The carboy has finished draining. It's so nice outside that I decide to cover the bottling bucket with Saran wrap, and move it outside to bottle in the sun.


Before bottling, I sterilize some bottle caps.


Let the bottling begin.


Progress. These are twenty two ounce bottles.


Fill bottle. Cap. Repeat.


About half way through the bucket (two and a half gallons in), I bottle six twelve ounce bottles. These will be my competition bottles. I wait until half of the beer has been bottled because the beer in the bucket has had enough time to let the yeast settle to the bottom.


Tell me this isn't a thing of beauty. 21 x 22 oz bottles, and 6 x 12 oz bottles.


All done.


I pour off the last bit that won't fit into another bottle, and give it a test. It tastes great! The hop aroma is a bit strong for a hef. If I did it again, I'd probably do a little bit less. Flavor is very crisp and clean. Clarity is perfect for a hef. Over all, I'm really pleased with this beer. I'm definitely going to enter it in some competitions.


Admiring my work.


Now, I pack everything up.


Sigh. Cleaning carboy, bucket, and kettle.


That's all! Stay tuned for labeling day, as soon as I get the labels from Gerry.